Overview
For a while now I have been looking for a self-hosted, cross-platform solution that would allow me to sync my browser data (specifically bookmarks and history) between different devices. In the past I’ve used some of the following but have not been entirely satisfied for a number of reasons:
- iCloud
- Not self-hosted
- Required extension (if not using Safari)
- Did not sync history (if syncing to windows machine)
- Xmarks
- Not self-hosted
- Did not sync history
- Required extension on all browsers
- Not mobile-friendly
- Floccus
- ✅ Self Hosted
- Did not sync history
- Requires extension on all browsers
- Not mobile-friendly
- Great for sharing bookmarks with others (Can use Nextcloud as storage)

Firefox Sync Server
Recently I discovered Firefox Sync Server which is an official self-hosted implementation of Mozilla’s sync service for syncing all Firefox account information. Although development on this is low priority, I have proved it to be reliable and well worth the effort to setup. Once configured, all my dreams come true:
- ✅ Self Hosted & Free!
- ✅ Cross-platform clients (requires the use of Firefox browsers – which I prefer anyway!)
- ✅ Mobile Friendly
- ✅ Syncs any or all of the following: Bookmarks, History, Tabs, Addresses, Credit Cards, Add-Ons, and Firefox Settings
Configure the Server
There are a few different ways to run the Firefox Sync Server but I found Docker-Compose to be the easiest way to get up and running quickly:
1. Setup docker (not covered in this post)
2. Create a new docker-compose (or stack):
version: '3.7'
services:
    syncserver:
        container_name: firefox_syncserver
        image: mozilla/syncserver:latest
        volumes:
            - data:/data
        ports:
            - 5000:5000
        environment:
            SYNCSERVER_PUBLIC_URL: 'https://firefoxsyncserver.your_domain.com'
            SYNCSERVER_SECRET: 'add_a_random_secret_text'
            SYNCSERVER_SQLURI: 'sqlite:////data/syncserver.db'
            SYNCSERVER_BATCH_UPLOAD_ENABLED: 'true'
            SYNCSERVER_FORCE_WSGI_ENVIRON: 'true'
            PORT: '5000'
        restart: always

volumes:
    data:
3. Setup remote access to the service. My preferred way is to use a reverse proxy lik NGINXProxyManager.
At minimum you need:
– A static ip or an externally accessible domain (if you don’t have one, you can get one via DuckDNS)
– Port forward the desired port to your Firefox Sync Server
4. Start/deploy the docker container/stack and navigate to the SYNCSERVER_PUBLIC_URL defined in the compose file to verify that the service is running correctly:

Setup Client Browsers
In order to use your self-hosted Firefox Sync Server you will need to configure each client to use your custom sync server:
Desktop Client
Changing the sync server on Firefox desktop is easy:
1. In your address bar navigate to: about:config
2. Search for: identity.sync.tokenserver.uri and modify the value to match the SYNCSERVER_PUBLIC_URL defined in the compose with an additional path of /token/1.0/sync/1.5

3. Sign into your Firefox Account as normal – This is only to authenticate – not to store your browser data. (You can also host your own Firefox Account Server, but that is out of the scope of this post).
4. Attempt to sync. The sync should take at least a few seconds – if it completes immediately, there may be an issue. To tell if the sync properly saved your browser data to your personal server, you can navigate to about:sync-log and browse the log files to make sure your sync server is being referenced instead of the default firefox sync server.
iOS Client
Changing the sync server on Firefox iOS is also easy:
1. Open the iOS Firefox app and navigate to Settings.
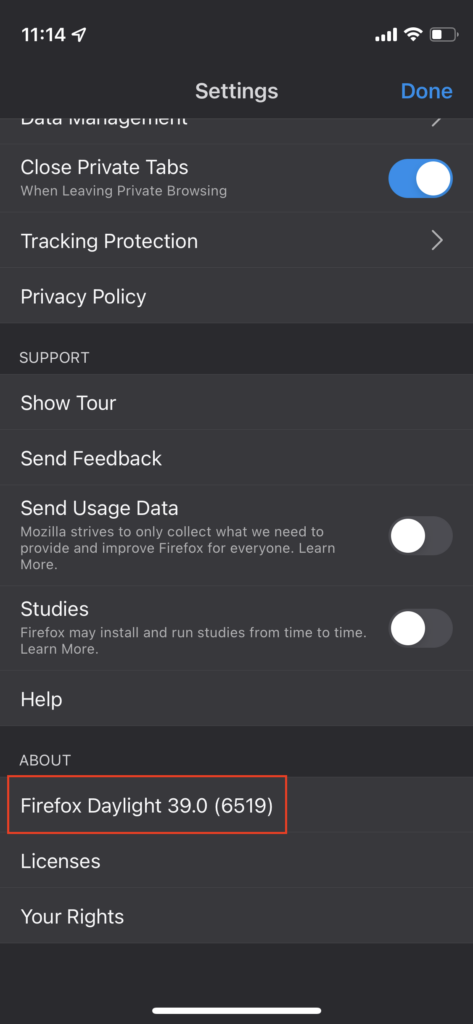
2. Scroll to the bottom of the settings pane and tap on “Firefox Daylight” five times quickly (This will enable the advanced/debug menu):
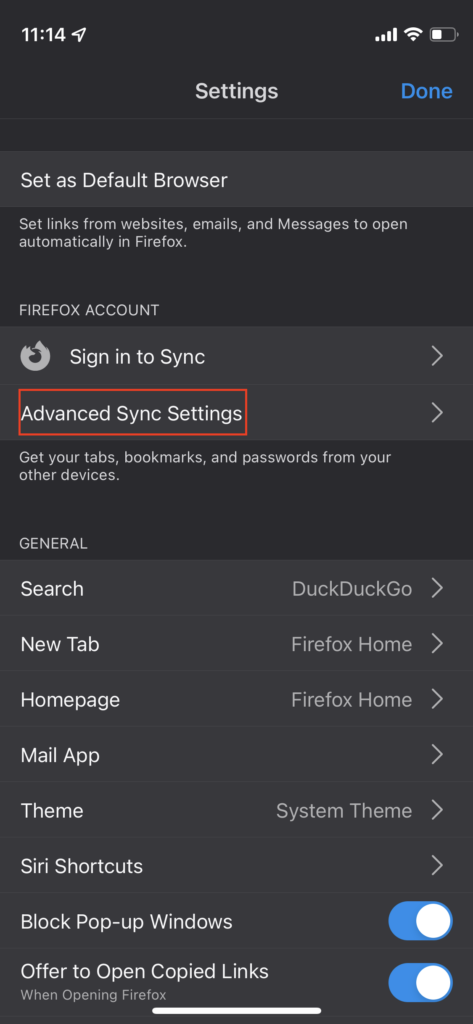
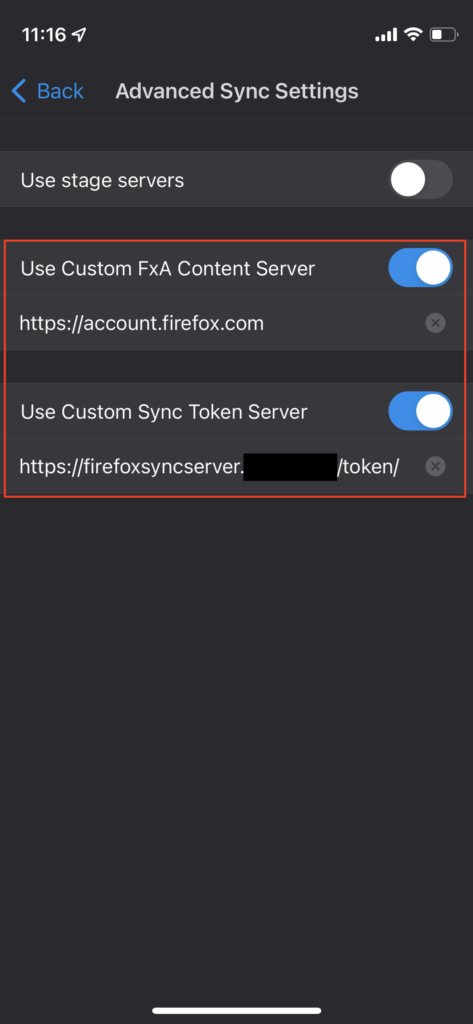
3. Setup the advanced settings according to the screenshots below (be sure to only include the /token/ path for the token server url – you do not need to additional `/1.0/sync/1.5` path that is needed for Firefox desktop. ALSO instead of the url in the screenshot, use accountS.firefox.org for the FxA server (note the S).
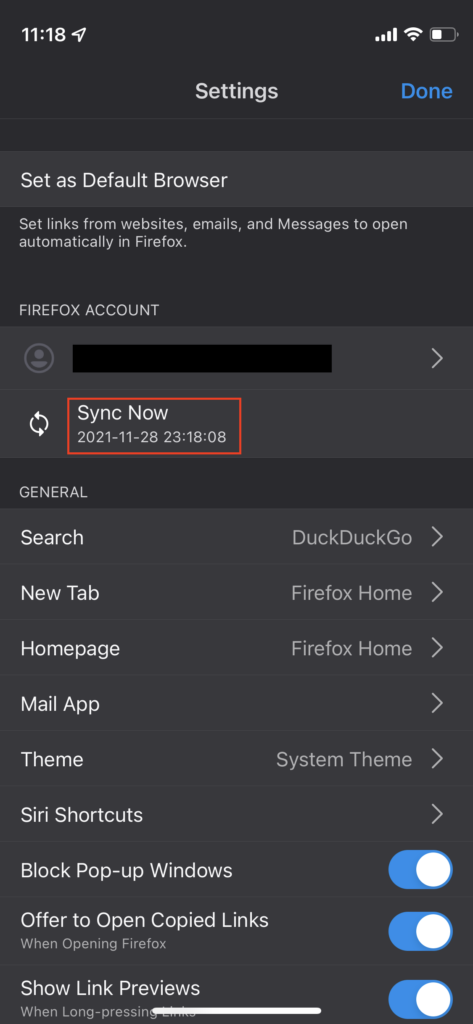
4. Sign into your Firefox Account (again this is only used to authenticate – not to store your browser data).
5. Sync your browser data, and confirm that you can see the changes on your other clients that are synced to your same Firefox Sync Server.


Decloud
Once you feel satisfied that your sync server is working correctly and that you have proper backups in place to prevent data loss, go ahead and remove your other sync solutions like (iCloud, Xmarks, etc) and delete the data stored on any of those cloud services. You’re in control of your data now!
~ Don’t litter! – That includes your personal data on the internet!