After migrating to OPNSense from pfSense, I have been discovering numerous features that I never knew existed in OPNSense. These little features are what makes me have zero regrets for switching to OPNSense. Today we will look at the various options for backing up configuration changes. After all, backups should be high on the priority list after first setting up OPNSense.
Nextcloud Backup
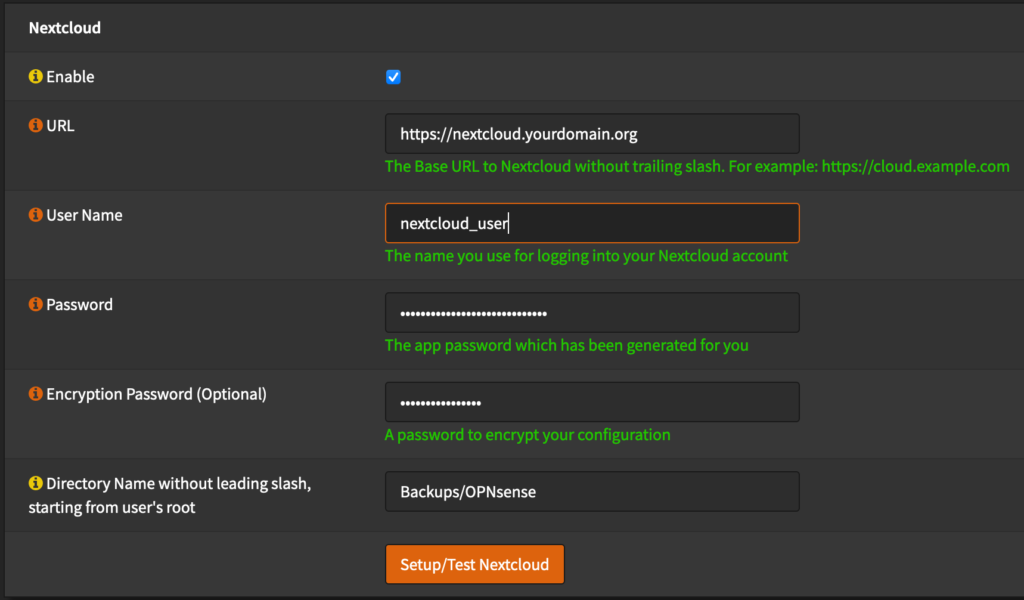
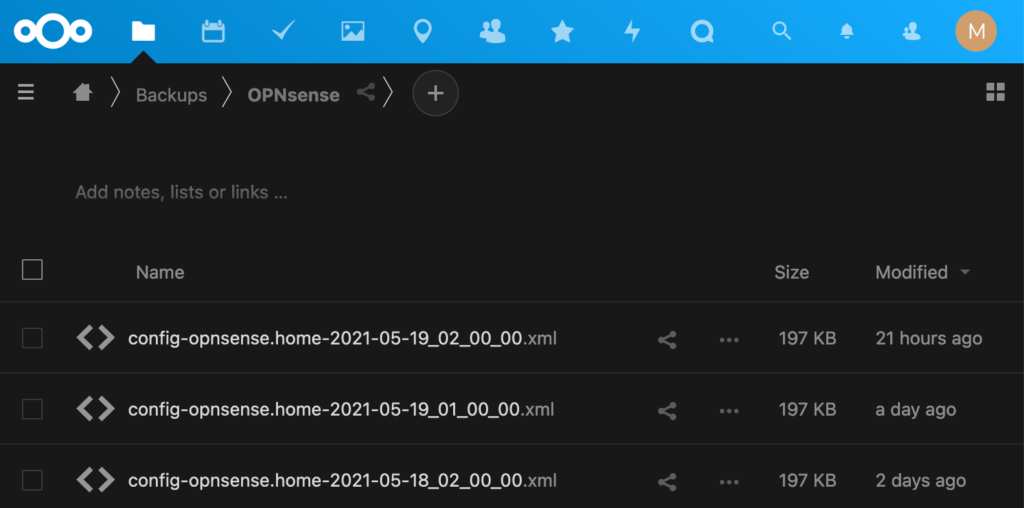
This is one of my favorite features of Nextcloud that was missing from pfSense. The ability to backup one Open-Source software to another just makes my day! It’s as easy as entering my Nextcloud credentials and specifying the backup location:
OPNSense Nextcloud Backup ConfigurationOPNSense Backups in Nextcloud
Manual Backup
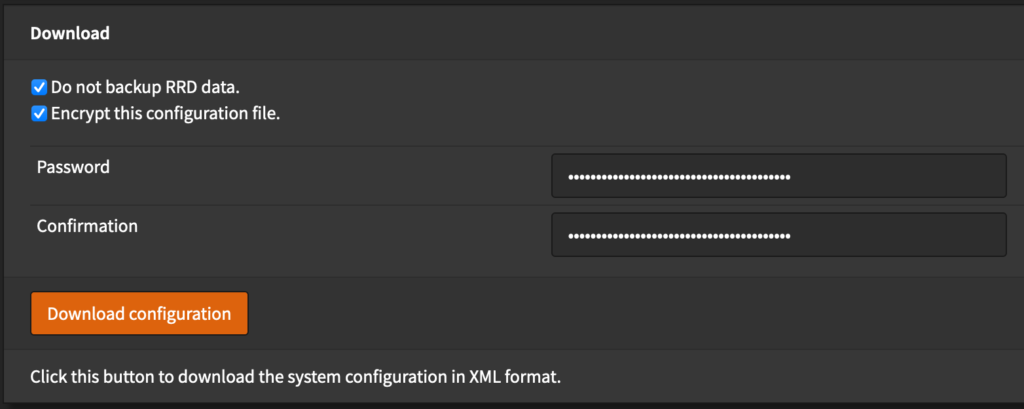
Manual backups are a quick and easy way to take a configuration backup. I generally use this if/when I need to rebuild my entire network/homelab from scratch (if/when my Nextcloud is not available to be backed up to)
OPNSense Manual Configuration Backup
Google Drive Backup
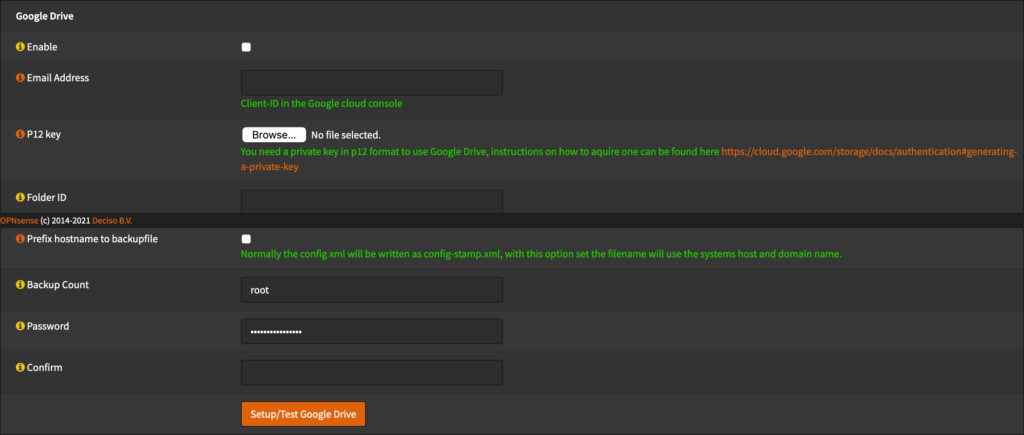
I won’t discuss much about this here since I’m not a fan of Google Drive for privacy reasons, but if you are, you can feel somewhat confident that your configuration that is saved on Google drive is safe because it can be encrypted.
I’ve been happily using pfSense for a few years now and have generally been quite happy with it’s performance and feature set, however I learned recently that the installation files that can be downloaded from the pfSense website is not the same code that is open sourced on Github. I try to stay away from the arguments about which software is ‘more’ open source friendly, but I do like to support the projects that are committed to a FOSS (Free and Open Source) model without up-selling additional features. I don’t have anything against up-selling additional features, but IMO up-selling additional features can lead to a neglected core product.
pfSense – Thank You
I am not leaving pfSense because I didn’t like the project, but because I wanted to try something new that is more committed to an Open Source future. pfSense is a great solution for any networking enthusiast, and I would not hesitate to recommend it. However, as you will see below, I would first recommend OPNsense for a few main reasons…
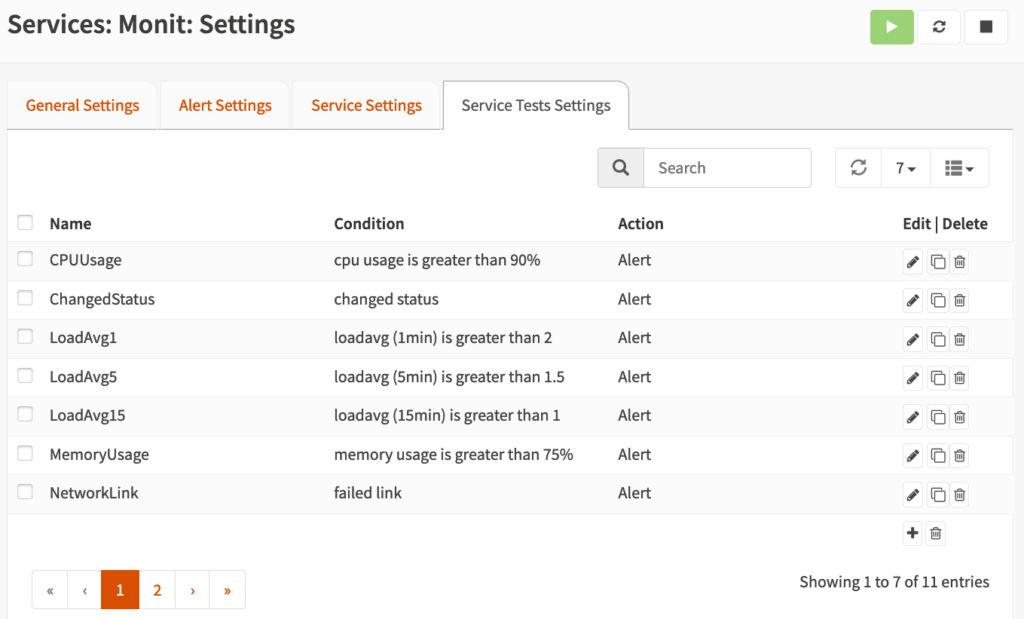
Full-featured email notifications (pfSense had some email notifications but they were severely limited)
I’ve always wondered about OPNsense and if it could offer some of the things I often wanted in pfSense but could not easily achieve, and so far I have been very pleasantly pleased with the installation & configuration.
Installation
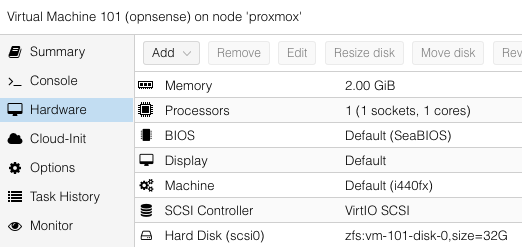
Installation was straightforward (although I installed it in a Proxmox VM):
Download ISO from OPNsense website & upload ISO to Proxmox server
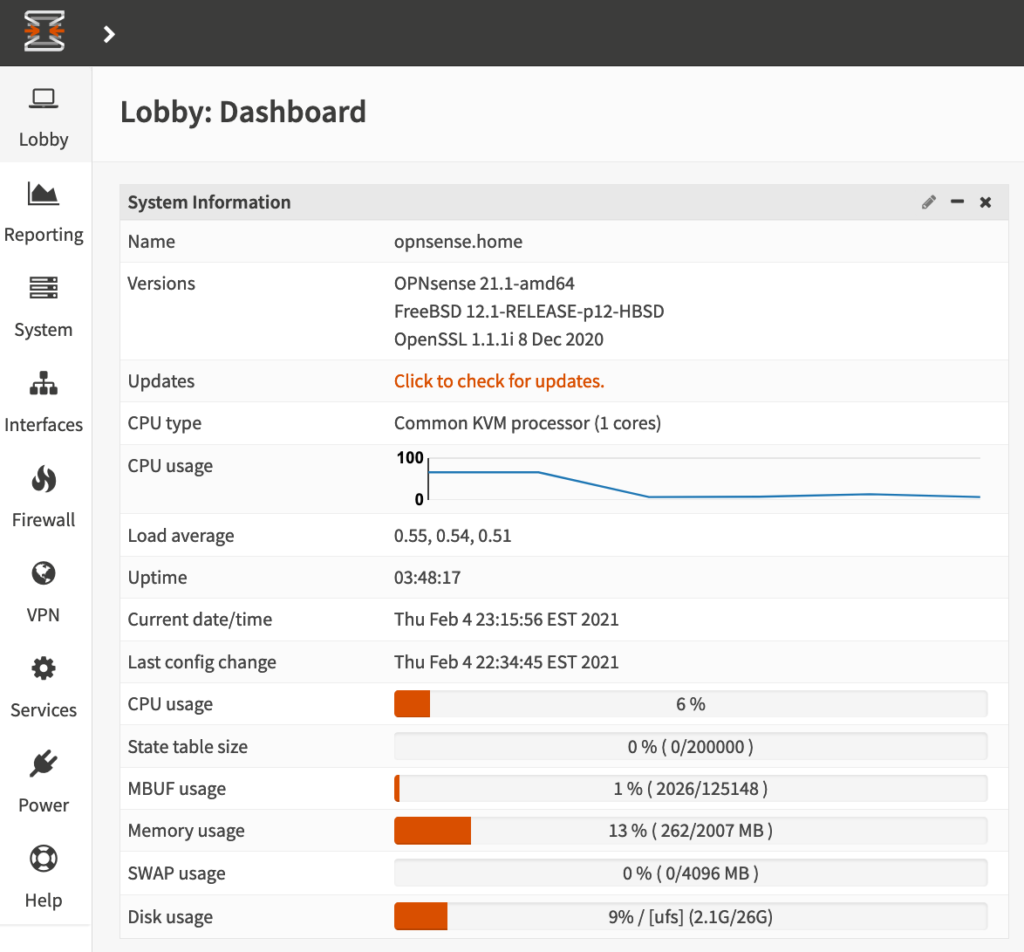
Finish the rest of the configuration in the OPNsense web GUI (Default user/password: root/opnsense)
Migrating from pfSense
The most daunting task that I was dreading was figuring out how to migrate to OPNsense from pfSense with minimal downtime. I had heard of a slight possibility that certain sections of pfSense configuration backups could be imported into OPNsense, but I decided to avoid that route in order to start with as clean of an OPNsense installation as possible. My migration path was:
Step through each menu in pfSense and update the corresponding setting in OPNsense
Some configuration items didn’t exist like the awesome pfBlocker (I will miss this)
When I came to the ‘Interfaces’ section, I setup each interface with a different (temporary) static IP
After all configuration items were finished, I began to shut down services on pfSense and enable them on OPNSense one at a time (i.e., disable dhcp on LAN, and enable LAN DHCP on OPNSense with same lease range)
Finally I disabled the interfaces on pfSense and re-configured the static IP addresses on the OPNSense interfaces to match how they were configured in pfSense.
The Features I’ve Always Wanted!
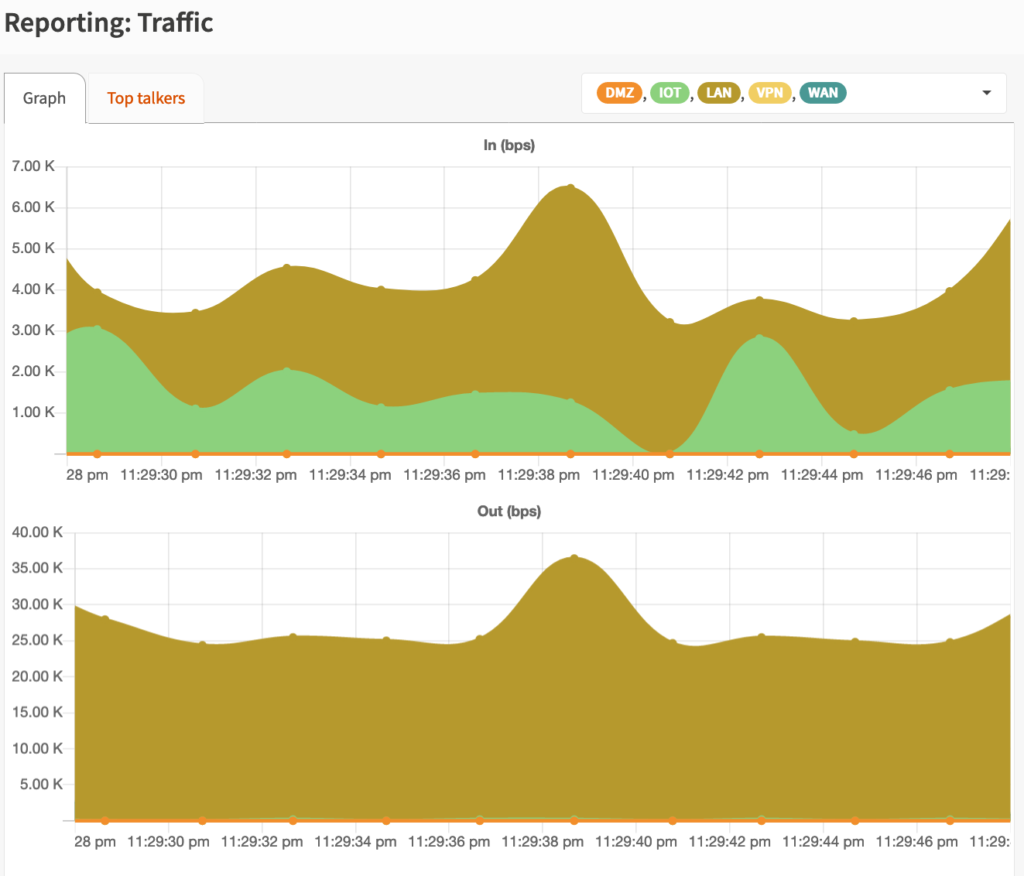
Full-featured Email Notifications, Reporting, Settings Search, Home Assistant Integration…