
Overview
Now that we’ve setup a Zabbix server and configured some hosts, we need to get notified when there are issues with our hosts. The easiest way to be notified is probably via email (This is my go-to notification option since it is so widely supported).
Email Configuration
Configuring the email service is pretty straightforward:
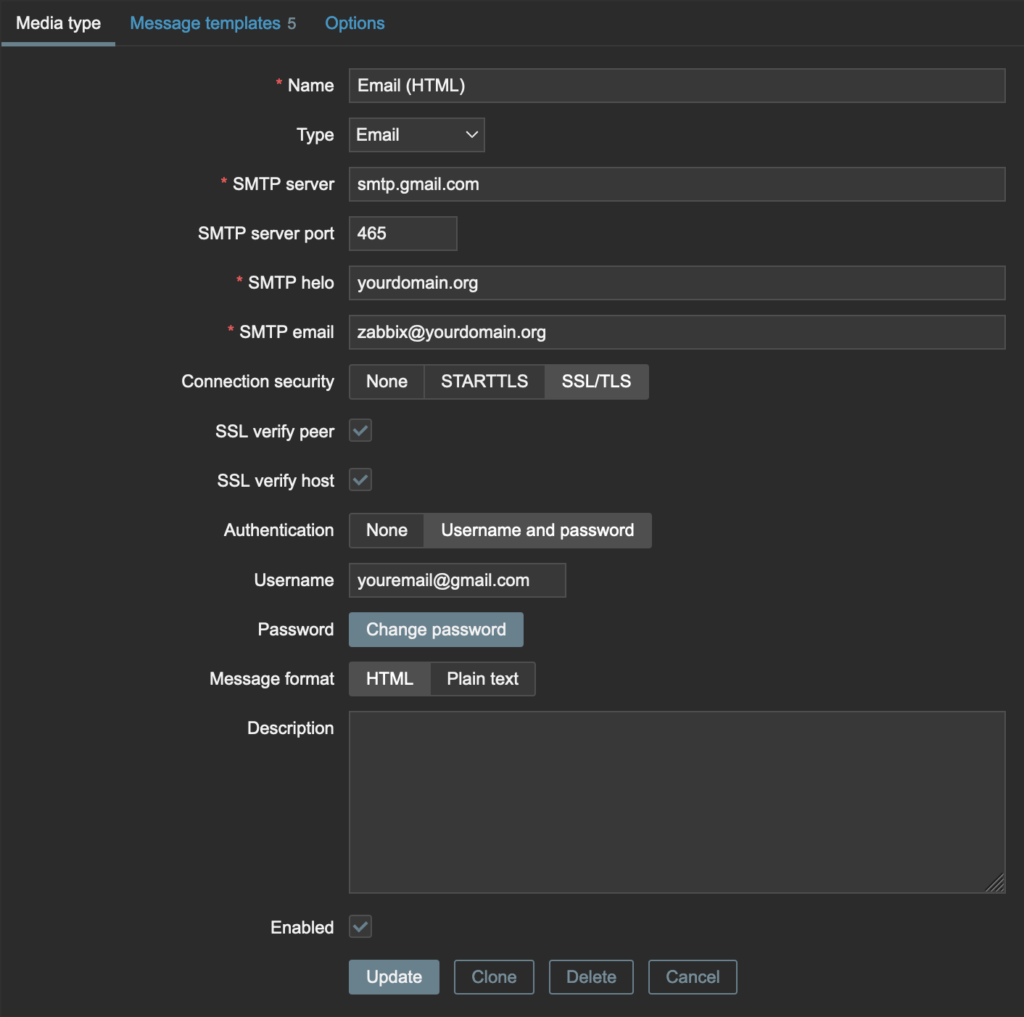
- In the Zabbix WebUI navigate to: Administration > Media Types > Email (HTML)
- Update the outgoing SMTP settings to match those of your email provider (i.e. Gmail)
- Be sure to setup and use an App Password if you have two-factor enabled for your email account.
- Click Update
- Click Test to make sure the settings work.
Enable Email Notifications for User
In order for emails to be sent, you need to enable them for your Zabbix user:
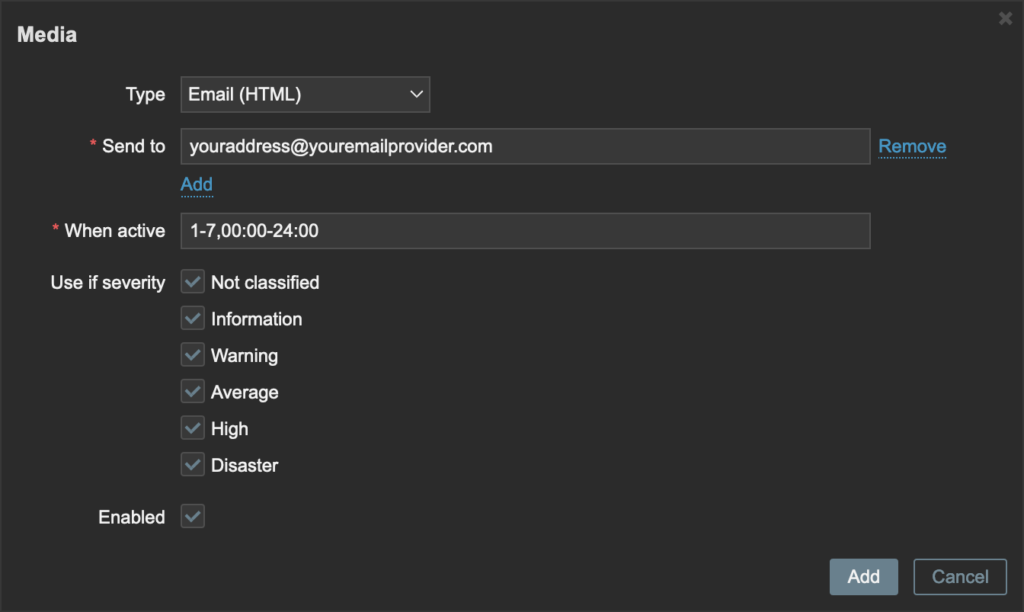
- In the Zabbix WebUI navigate to: User Settings > Media > Add
- In the Type box choose ‘Email (HTML)‘
- Add the email address to which you would like to send notifications.
- Click Add
- Click Update
Choose Which Notifications to Receive
Now that we have the email service configured and the user set to receive emails, we need to tell Zabbix which types of emails to send (what severity, which hosts, or which triggers). In general I like to be notified of any triggers that have a severity of Average or above:
- In the Zabbix WebUI navigate to: Configuration > Actions > Report problems to Zabbix administrators
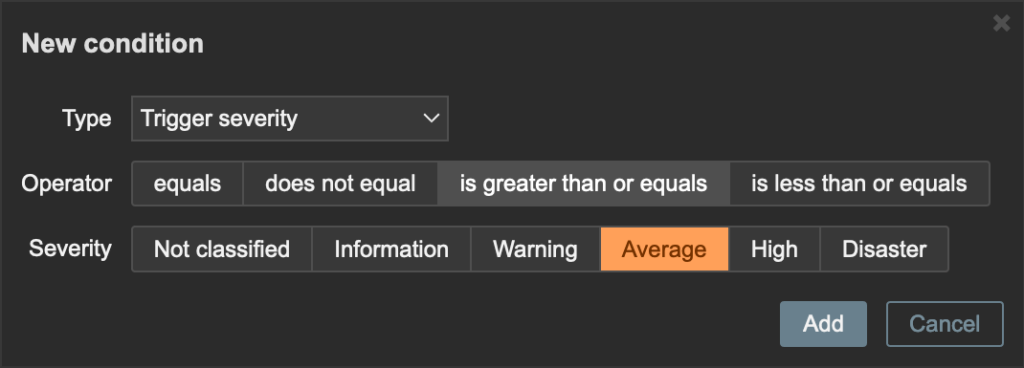
- Under Conditions click Add
- Choose Type:Trigger severity and choose what severity you would like to be notified for (I choose ‘is greater than or equals’ a severity of ‘Average‘
- Click Add
- Check the Enabled box.
- Click Update
Enjoy!
Now sit back and wait for the notifications to roll in – or instead of waiting, go make some breaking changes to your Hosts! (Just make sure you can roll back your changes easily with something like Proxmox backups/snapshots!)