Overview
If you’re not sure what Zabbix is or how to set it up, see my first Zabbix blog post. Once we have a running instance of the Zabbix server we can begin adding hosts that we would like to monitor. Adding a host consists of two primary steps: Configure the Client & Configure the Host (Server).
Configuring a Host
In order for Zabbix to get information from a client machine (Zabbix calls them Hosts) we need to configure some kind of protocol for Zabbix to use when fetching information. Some of the most popular protocols Zabbix uses are:
- Zabbix Agent <- I Prefer this
- SNMP <- Often built in – so requires no additional software
- JMX <- For monitoring Java applications(?)
- IPMI <- Good for enterprise gear (HP iLO, DELL DRAC, IBM RSA, Sun SSP, etc)
Below are a few host configurations for some of the above ‘protocols’.
Host Configuration: Zabbix Agent
In order to use the Zabbix agent, we can simply install the agent like any other package:
# Install the agent on Ubuntu/Debian
apt-get install zabbix-agent

# Configure agent with Zabbix server address
nano /etc/zabbix/zabbix_agentd.conf
# Update `Server=` to the ip/hostname of your Zabbix server

# Start the Zabbix Agent
service zabbix-agent start
Host Configuration: SNMP
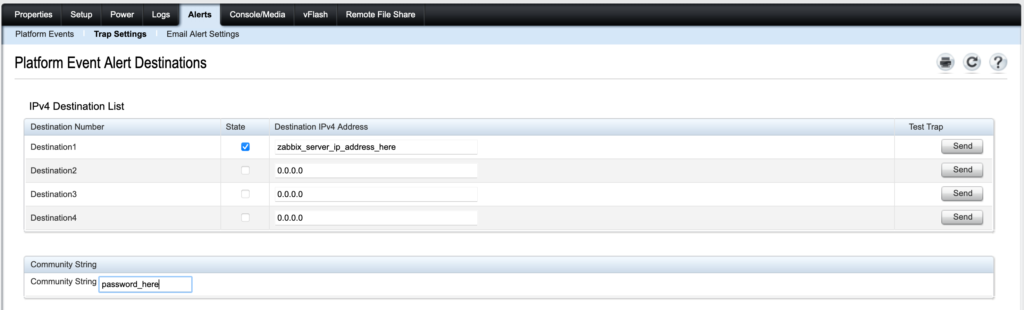
Configuring the host with SNMP will be different for each machine, but usually there is some kind of simple GUI that allows you to enable SNMP, and provide a community string (a sort of authentication). Here’s an example that used the term ‘Trap’ to represent the SNMP configuration:
Host Configuration: IPMI
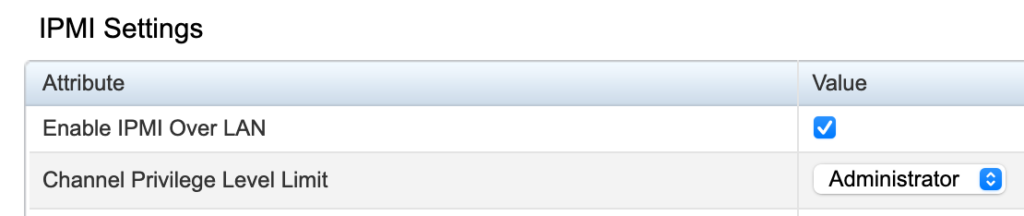
The IPMI configuration also may be different for each machine, but it is generally pretty easy to enable:
Configuring a Host on the Server (Zabbix)
Once we have the hosts configured with at least once source ‘protocol’ we can add them to Zabbix. This is also pretty straightforward:
- In the Zabbix WebUI navigate to:
Configuration > Hosts > Add Hostand provide a hostname, a group and interface(s). Once finished, click Add. Note: you can also use a hostname in the DNS name field instead of an ip address.- Note: If configuring IPMI, you’ll need to provide the host credentials on the IPMI tab.
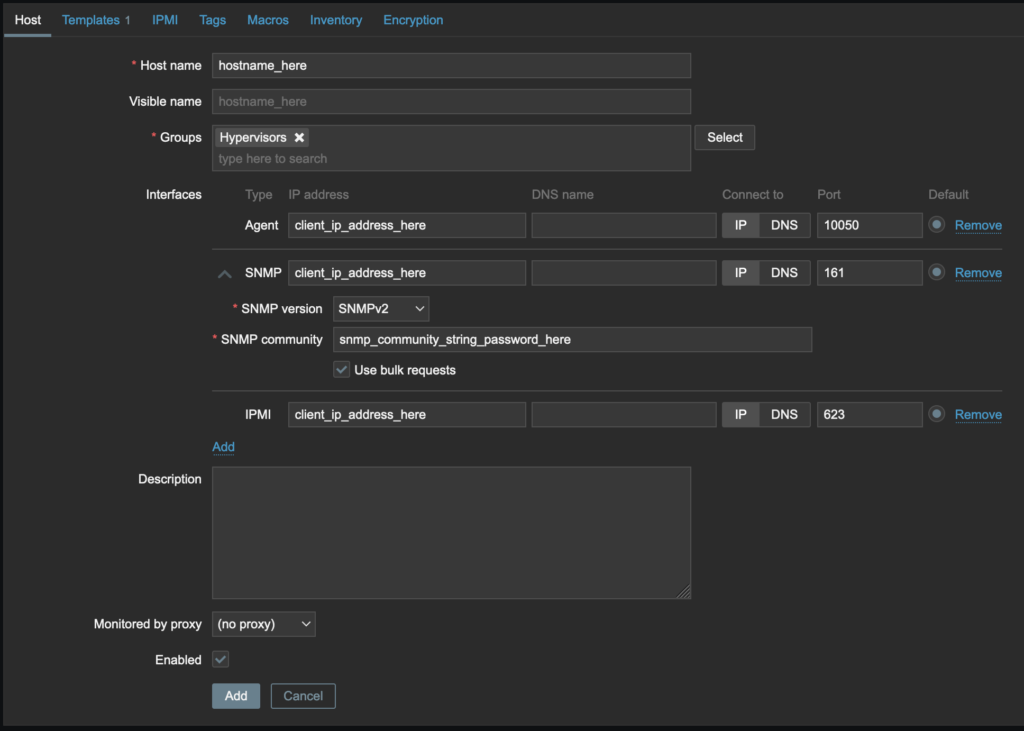
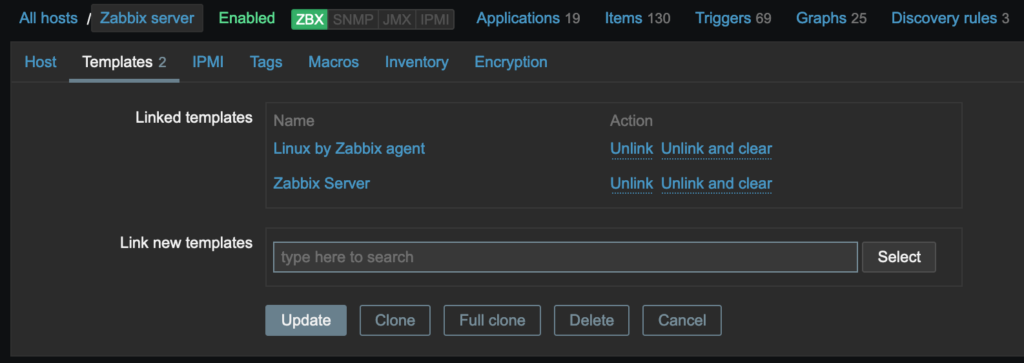
- Also, be sure to add at least one Template to the host. Templates help Zabbix categorize the data it fetches from the hosts – templates can be used on many machines to standardize the data that is fetched from the hosts.
- You can search for existing templates in the Link new templates field and add any relevant templates you think may be useful.
- When searching for templates I usually search for the protocol (Agent/SNMP/IPMI/etc)
Monitor your Hosts
Now that we have some hosts added we can monitor them and view any problems or issues that may need to be addressed:

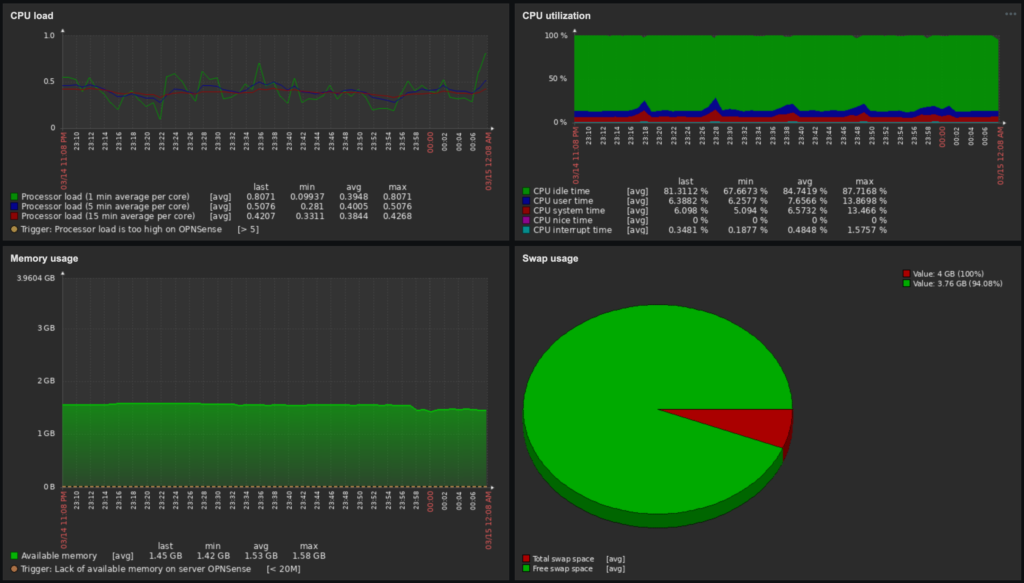
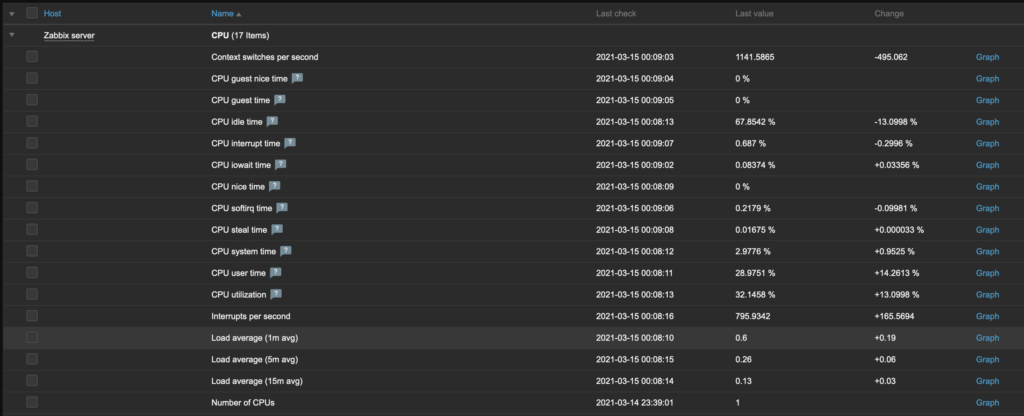
By clicking on the links we can view the Latest Data any Problems or even some nice Graphs for each Host:
There are some pretty slick options for getting notifications when problems happen, reporting, network maps, and more, but we’ll have to save those goodies for a future blog post. For now, get to work adding your hosts!
~ Thought of the Day: Why is it normal in the US for a waiter to take your credit card out of your sight when processing payments? To me this is like having your email password in plain text of the footer of your email!