What is Zoneminder
Zoneminder is a Free Open Source Software (FOSS) Network Video Recorder (NVR). It is claims to be one of the most advanced and scalable video surveillance systems available. It provides an API that can be used via a web interface, a mobile app, or third party software. Out of the box
Zoneminder offers a simple camera viewer, motion detection, event notifications, and much more. Since a picture is worth a thousand words, here’s what a ‘montage’ view on Zoneminder looks like (via the iOS app and the web view).
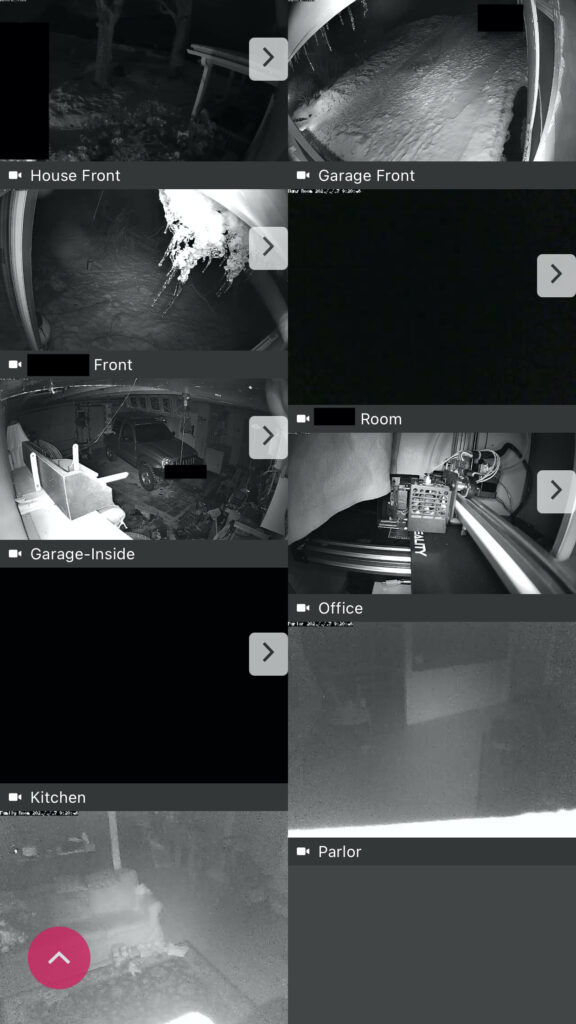
The Mobile App (ZmNinja) is also open source. It can be compiled or purchased on the AppStore for around $6. It offers a very elegant and full-featured interface to mange cameras, view events, and receive push notifications to mention a few.
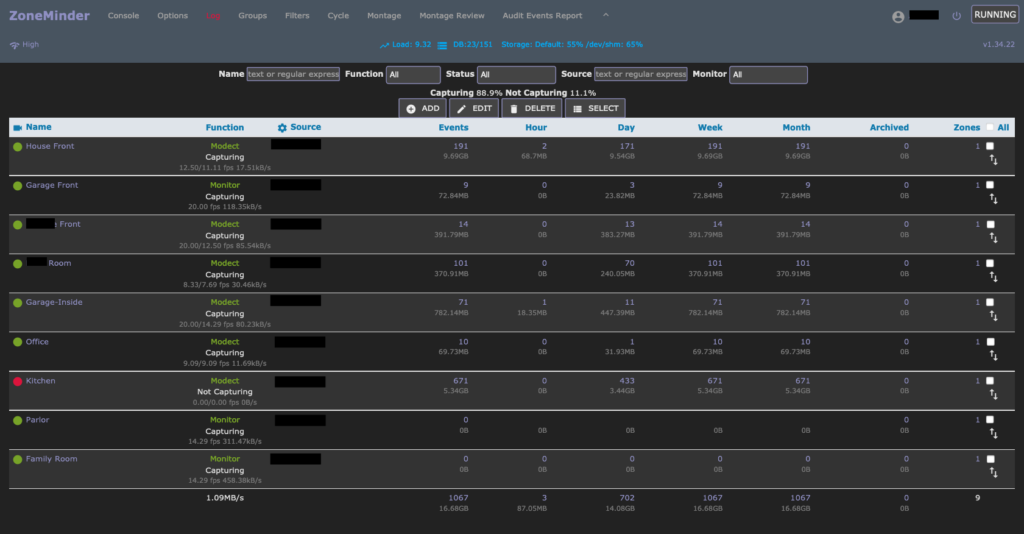
This screenshot of the web view shows a list of connected cameras, their configurations, and events. A ‘montage’ camera stream view similar to the iOS view is also available.
Why use Zoneminder?
- It’s Open Source! If you’ve read any of my other posts, I’m a huge proponent of Free & Open Source Software (FOSS). Open Source means the software can be trusted to not include nasty key loggers and other privacy invasive features (I’ll admit I rarely verify this myself).
- It’s Free! Since Zoneminder is free (and always will be) it is worth trying!)
- It’s feature rich! It lacks very little (if any) features that commercial NVR systems offer.
- It’s relatively easy to install (See below for installation/configuration details)
- It’s locally controlled! (No cloud needed – or wanted!
- It has an optional Open Source mobile App (Approx. $6 if you buy it on the AppStore)
- It’s hardware efficient (IMO – It seems to require less resources than alternatives).
- It has a Home Assistant integration!
If the above reasons aren’t enough to convince you to give Zoneminder a try, I can tell you from experience that I’ve tried most of the other alternatives to Zoneminder (MotionEye, BlueIris, AgentDVR) and have found Zoneminder to be superior in most respects (although a bit more advanced to setup – see below). I don’t mean to be critical, but below I will list my main complaints about the alternatives I’ve listed. If I’ve forgotten about other good alternatives, pleas let me know in the comments!
- MotionEye
- Seemed to be quite resource hungry
- No mobile app (although web interface is quite reasonable)
- Did not seem very scalable (more than 4 cameras seemed to be buggy for me)
- BlueIris
- Currently Windows Only as of 2021
- Not Free ($65 as of 2021)
- Not Open Source
- AgentDVR
- Subscription required for advanced features and updated via web GUI
- Requires a web account for some features
- Requires webRTC (a technology I’m not a huge fan of)
- No mobile App (although webGUI is quite reasonable)
How Zoneminder?
I’ll admit that Zoneminder can seem daunting to setup for someone not very tech-savvy, and may not be the best choice for someone with no knowledge of linux or command line experience. For most people that are reading this they probably already have enough tech knowledge or are willing to learn how to setup Zoneminder. There are a variety of ways to setup Zoneminder, but since I already use Docker, it was definitely the easiest path for me and the one I will outline below:
Install Docker Engine
If you don’t already have the docker engine installed, you’ll need to install it via the terminal or via a Docker Desktop application. Once installed you will have access to the docker terminal command.
Install Docker-Compose
Although docker-compose isn’t technically required, it does make running docker containers much more manageable and repeatable (if the physical computer you have docker on crashes). Follow the official documentation to install docker-compose.
Create your docker-compose file.
Create a directory somewhere called docker-compose (mine is located at ~/docker-compose). Inside that directory create a file named docker-compose.yaml and in a text editor modify the file to look like the following (If you want to access Zoneminder on a port other than 80, modify the first ’80’ in the ports section, otherwise, leave it as is).
version: "3"
services:

  # Zoneminder Docker-Compose Configuration
  zoneminder:
      container_name: zoneminder
      restart: always
      image: dlandon/zoneminder
      network_mode: bridge
      privileged: false
      shm_size: 1gb
      ports:
          - '80:80/tcp'
          - '9000:9000/tcp'
      environment:
          - TZ=America/New_York
          - PUID=99
          - PGID=100
          - INSTALL_HOOK=0
          - INSTALL_FACE=0
          - INSTALL_TINY_YOLOV3=0
          - INSTALL_YOLOV3=0
          - INSTALL_TINY_YOLOV4=0
          - INSTALL_YOLOV4=0
          - MULTI_PORT_START=0
          - MULTI_PORT_END=0
      volumes:
          - zoneminder_config:/config:rw
          - zoneminder_data:/var/cache/zoneminder:rw

volumes:
  # Zoneminder docker volumes (located in /var/lib/docker/volumes)
  zoneminder_config:
  zoneminder_data:
That’s about it, now we should be able to run Zoneminder! A few optional notes before we try it:
- The configuration above will automatically start Zoneminder whenever the host machine (your computer, or the Proxmox Virtual Machine in my case – stay tuned for some Proxmox tutorials!) is started.
- The configuration above can also be modified to also run a ZoneminderEventNotification, object detection server, and more. Basically you just need to change the 0’s to 1’s (note if you do this it could take hours on the first start of Zoneminder since it will need to compile dependencies).
Running Zoneminder!
To start Zoneminder we just need to tell docker to run our docker-compose file which will run any containers defined in it (currently only Zoneminder). To run the docker-compose file simply run:
# Remember this command - you'll need it to restart your docker containers
# if they don't start up automatically for some reason

docker-compose up -d

# If you get a permissions error, you may need to run the command as sudo

sudo docker-compose up -d
Give it a few minutes to configure itself and then try to navigate to http://<your-computer-ip-address>/zm/ or http://localhost/zm/ and you should see Zoneminder!

If you don’t see the Zoneminder web interface, give it some more time because it could still be starting up (it takes a while on the first start). For additional troubleshooting you can also visit the Zoneminder Forums.
Zoneminder System Configuration
I’ll leave all the advanced options up to you, but some Zoneminder options should probably be changed right away by clicking on the Options menu:
- I would recommend adding authentication under
Options > System > OPT_USE_AUTH- If using authentication, add some random text to
Options > System > AUTH_HASH_SECRET
- If using authentication, add some random text to
- If you want to use Zoneminder with Home Assistant, make sure
Options > System >OPT_USE_API is enabled (see below for Home Assistant configuration)
Add Cameras
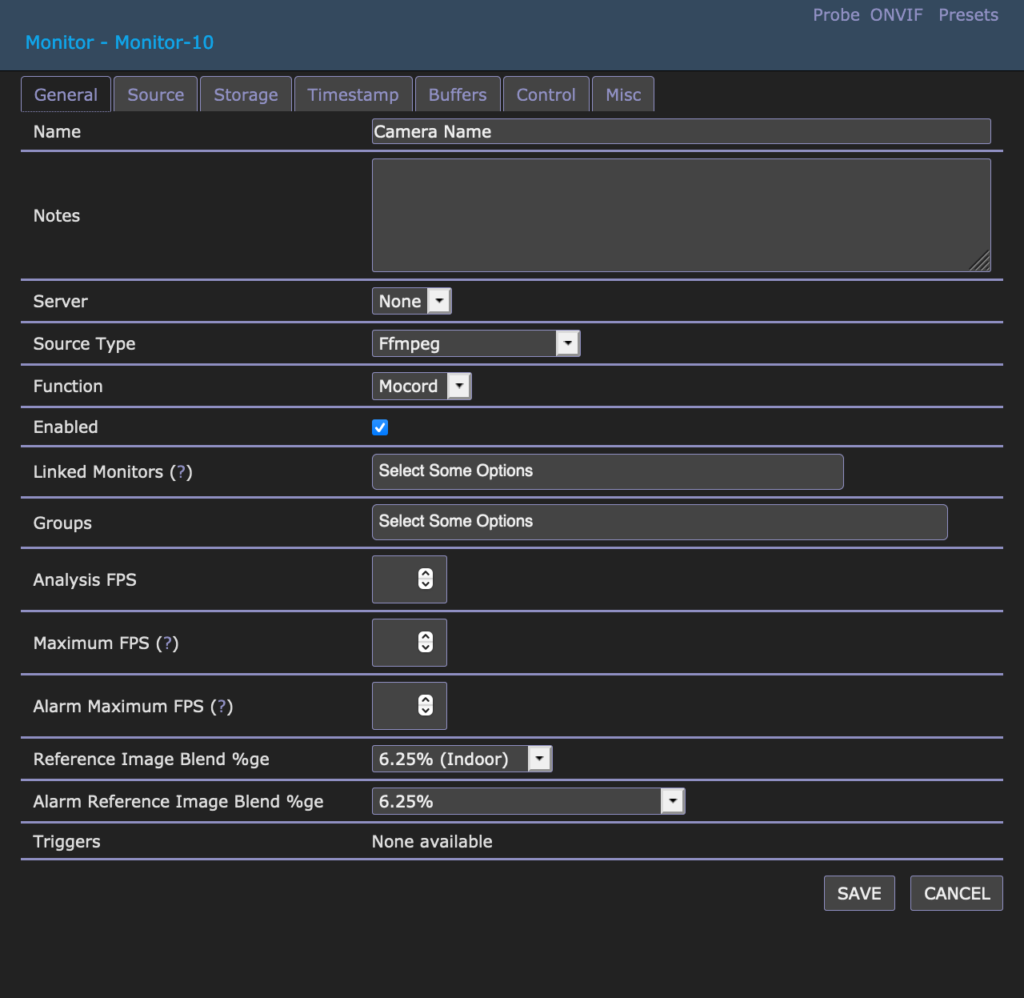
To add a camera, simply click on +Add in the Console view. You will be prompted with a camera configuration – don’t be overwhelmed with the options, you only need to change a few:
- General Tab:
- Name : the name of your camera
- Source Type:
- ffmpeg if you have access to an RTSP stream for your camera
- Remote if you only have an ip address for your camera and no RTSP stream
- Source Tab:
- If using ffmpeg, enter your RTSP stream in
Source Path - If using Remote, enter your camera’s ip address in
Host Nameand choose the camera’s port and/or path of the camera image files - Choose your camera’s resolution
- If using ffmpeg, enter your RTSP stream in
Click Save.
After saving the camera configuration you should see the camera on the Console view with a green indicator icon. If the indicator is red, you may need to play with the camera configuration some more or consult the Zoneminder documentation for more details about your type of camera.
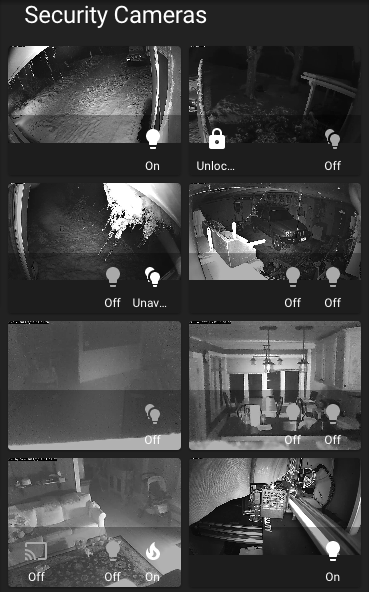
Home Assistant Integration
If you haven’t heard of Home Assistant, read my post about it here. If you know about Home Assistant you’ll want the integration which is almost too easy to install. Simply navigate to Configuration > Integrations > + and search for Zoneminder. If you don’t find Zoneminder, you may need to set it up via configuration.yaml since the config-flow setup was removed after a bug was found. To set up the integration manually, add the following to your configuration.yaml:
# Be sure to add zoneminder_url, zoneminder_username, and zoneminder_password
# to your secrets.yaml file!

zoneminder:
  - host: !secret zoneminder_url
    username: !secret zoneminder_username
    password: !secret zoneminder_password

camera:
  - platform: zoneminder
For additional configuration options see the Home Assistant docs.
Closing Notes
This post was not intended to cover all the features and configurations of Zoneminder. Don’t forget to explore other features configurations like:
- The Mobile App
- Event/Alert Notifications
- Object Detection (see yolov4 in your docker_compose file)
- Remote Access from outside your network so you can access it like: https://zoneminder.yourdomain.com
- (I’d suggest using a reverse proxy like NGINXProxyManager – stay tuned for a tutorial about this)