Background
I’ve been happily using pfSense for a few years now and have generally been quite happy with it’s performance and feature set, however I learned recently that the installation files that can be downloaded from the pfSense website is not the same code that is open sourced on Github. I try to stay away from the arguments about which software is ‘more’ open source friendly, but I do like to support the projects that are committed to a FOSS (Free and Open Source) model without up-selling additional features. I don’t have anything against up-selling additional features, but IMO up-selling additional features can lead to a neglected core product.
pfSense – Thank You
I am not leaving pfSense because I didn’t like the project, but because I wanted to try something new that is more committed to an Open Source future. pfSense is a great solution for any networking enthusiast, and I would not hesitate to recommend it. However, as you will see below, I would first recommend OPNsense for a few main reasons…
- Full-featured email notifications (pfSense had some email notifications but they were severely limited)
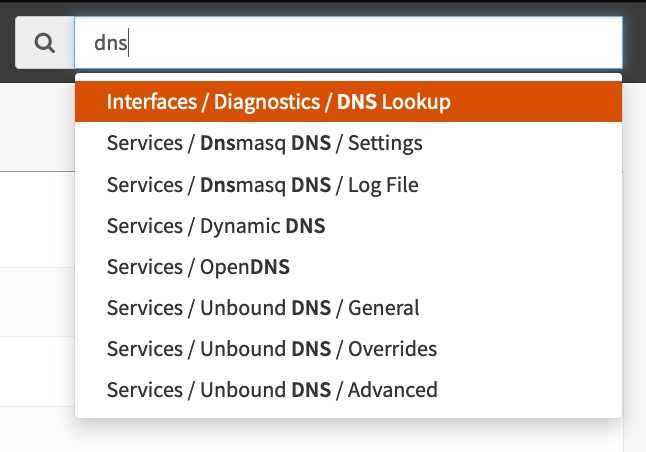
- A search for settings (IMO, the pfSense menus were poorly organized)
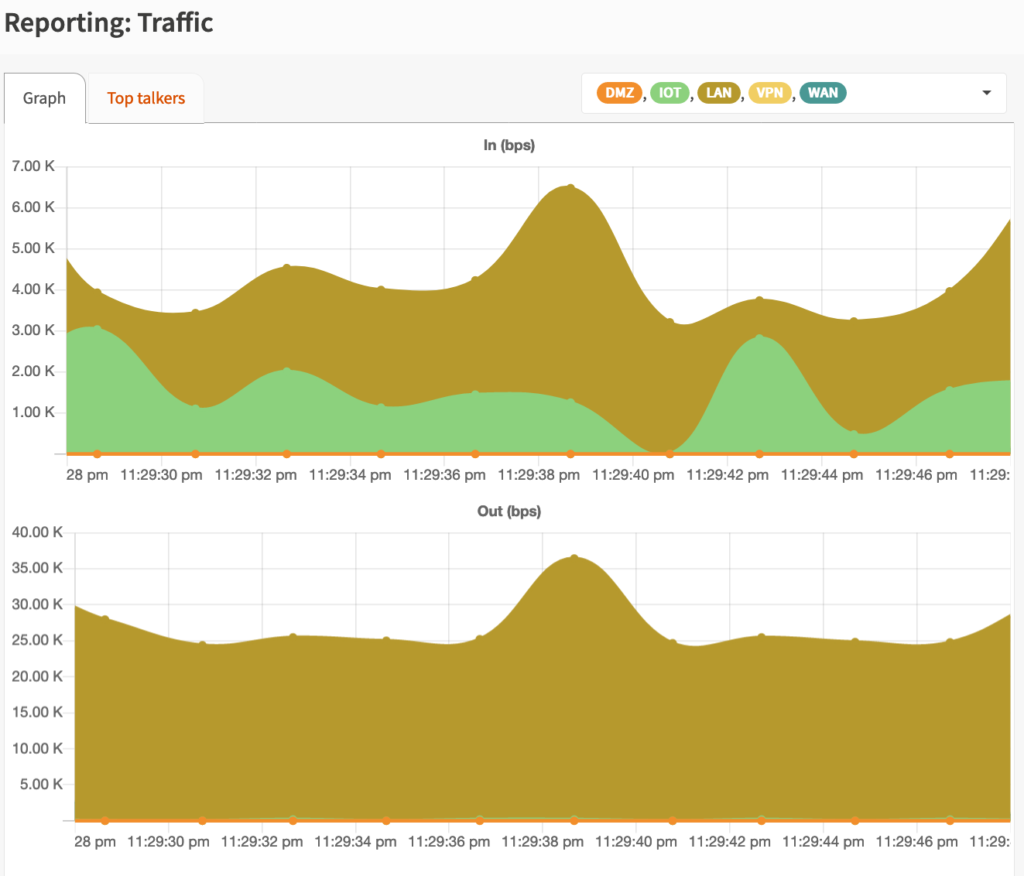
- Reports (pfSense has some summary statistics & status pages, but no all-in-one way to generate reports on a wide range of network statistics)
- TOTP Two Factor authentication login (pfSense may now support this?)
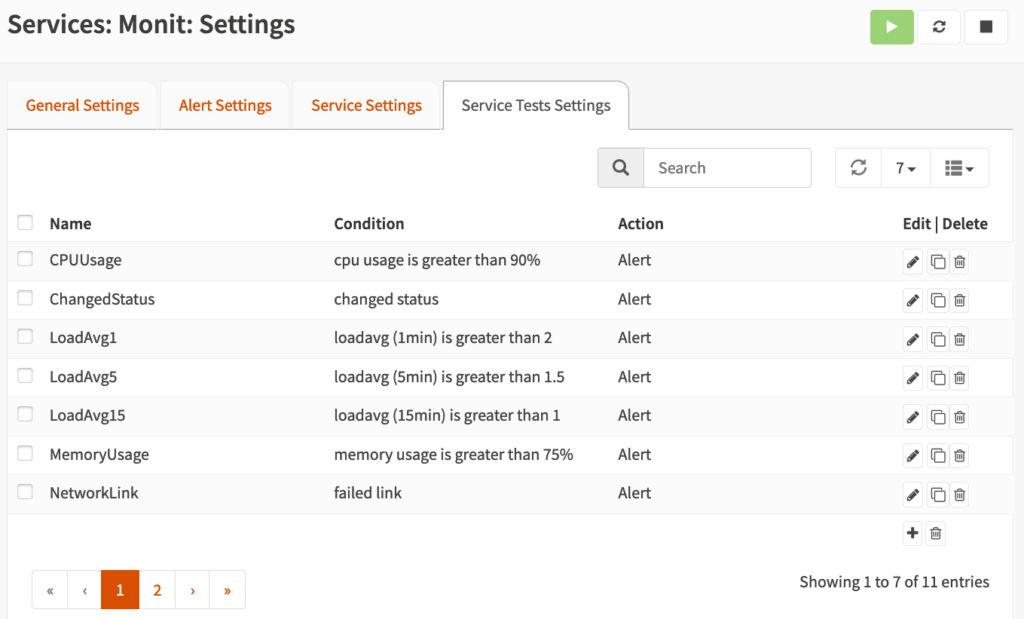
- Event-based automation (pfSense had a Watchdog package that would restart services, but was limited)
- Official API (pfSense had unofficial APIs and hacks, but nothing full-featured)
- Home Assistant integration (pfSense did have a HACS integration, but it required additional hacks to setup)
- Nextcloud Configuration Backups
OPNSense – The Future is Now
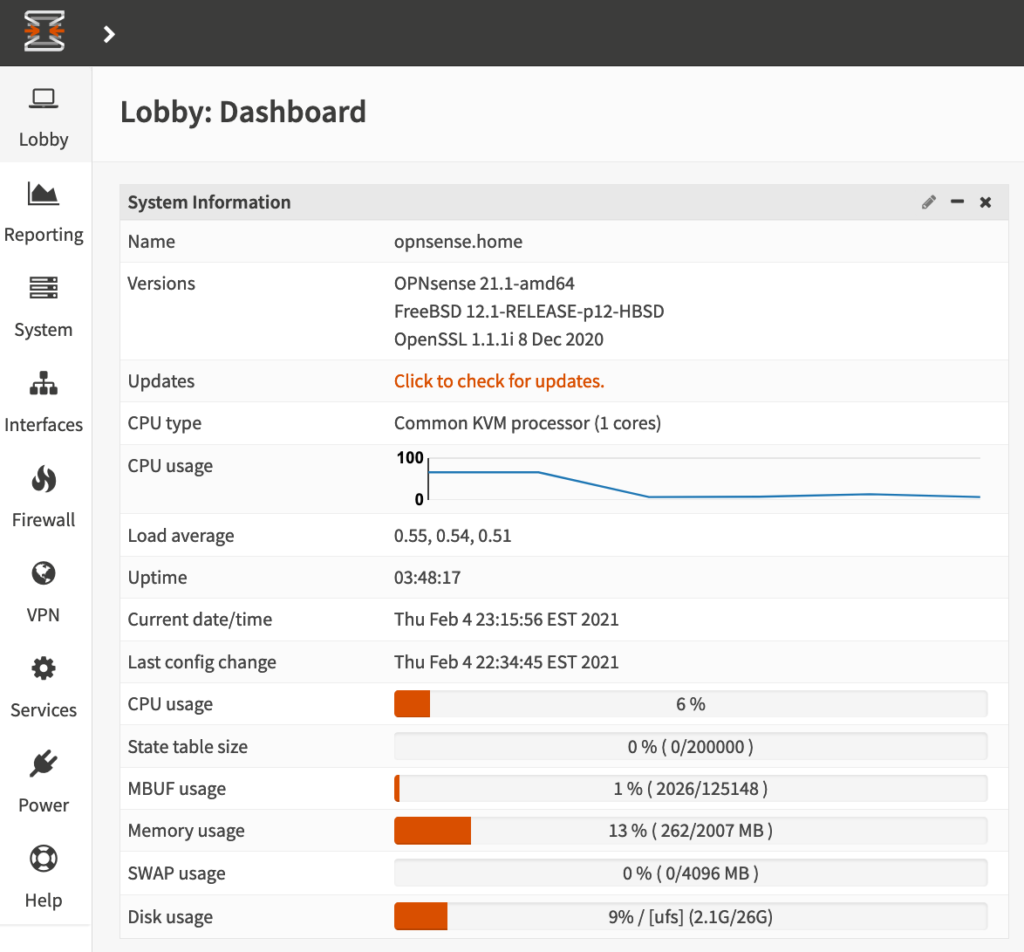
I’ve always wondered about OPNsense and if it could offer some of the things I often wanted in pfSense but could not easily achieve, and so far I have been very pleasantly pleased with the installation & configuration.
Installation
Installation was straightforward (although I installed it in a Proxmox VM):
- Download ISO from OPNsense website & upload ISO to Proxmox server
- Create a new Proxmox VM:
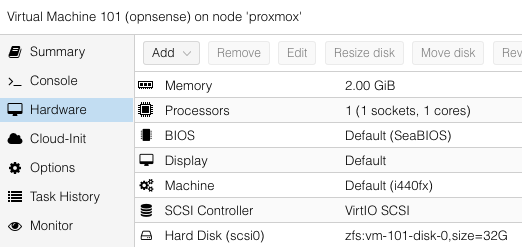
- Attach ISO to VM & start VM
- Follow the installation wizard & tips on the OPNsense documentation.
- Finish the rest of the configuration in the OPNsense web GUI (Default user/password: root/opnsense)
Migrating from pfSense
The most daunting task that I was dreading was figuring out how to migrate to OPNsense from pfSense with minimal downtime. I had heard of a slight possibility that certain sections of pfSense configuration backups could be imported into OPNsense, but I decided to avoid that route in order to start with as clean of an OPNsense installation as possible. My migration path was:
- Step through each menu in pfSense and update the corresponding setting in OPNsense
- Some configuration items didn’t exist like the awesome pfBlocker (I will miss this)
- When I came to the ‘Interfaces’ section, I setup each interface with a different (temporary) static IP
- After all configuration items were finished, I began to shut down services on pfSense and enable them on OPNSense one at a time (i.e., disable dhcp on LAN, and enable LAN DHCP on OPNSense with same lease range)
- Finally I disabled the interfaces on pfSense and re-configured the static IP addresses on the OPNSense interfaces to match how they were configured in pfSense.
The Features I’ve Always Wanted!
Full-featured Email Notifications, Reporting, Settings Search, Home Assistant Integration…